Arduino: Bridging the Gap from Hobby to Innovation
Exploring the Wonders of Arduino: From Hobbyists' Workbench to Innovative Solutions


Greetings, readers! Today, we are gonna deep dive into the most interesting board Arduino.
What is an Arduino
Arduino is an open-source electronics platform based on easy-to-use hardware and software. It was designed for engineers, designers, and others who want to incorporate physical computing into their designs without having any prerequisite engineering knowledge and with less investement.
Arduino consists of a physical programmable board (referred to as a microcontroller) and an Arduino IDE (Integrated Development Environment) that runs on your laptops and computers, used to write and upload computer code to the physical board.
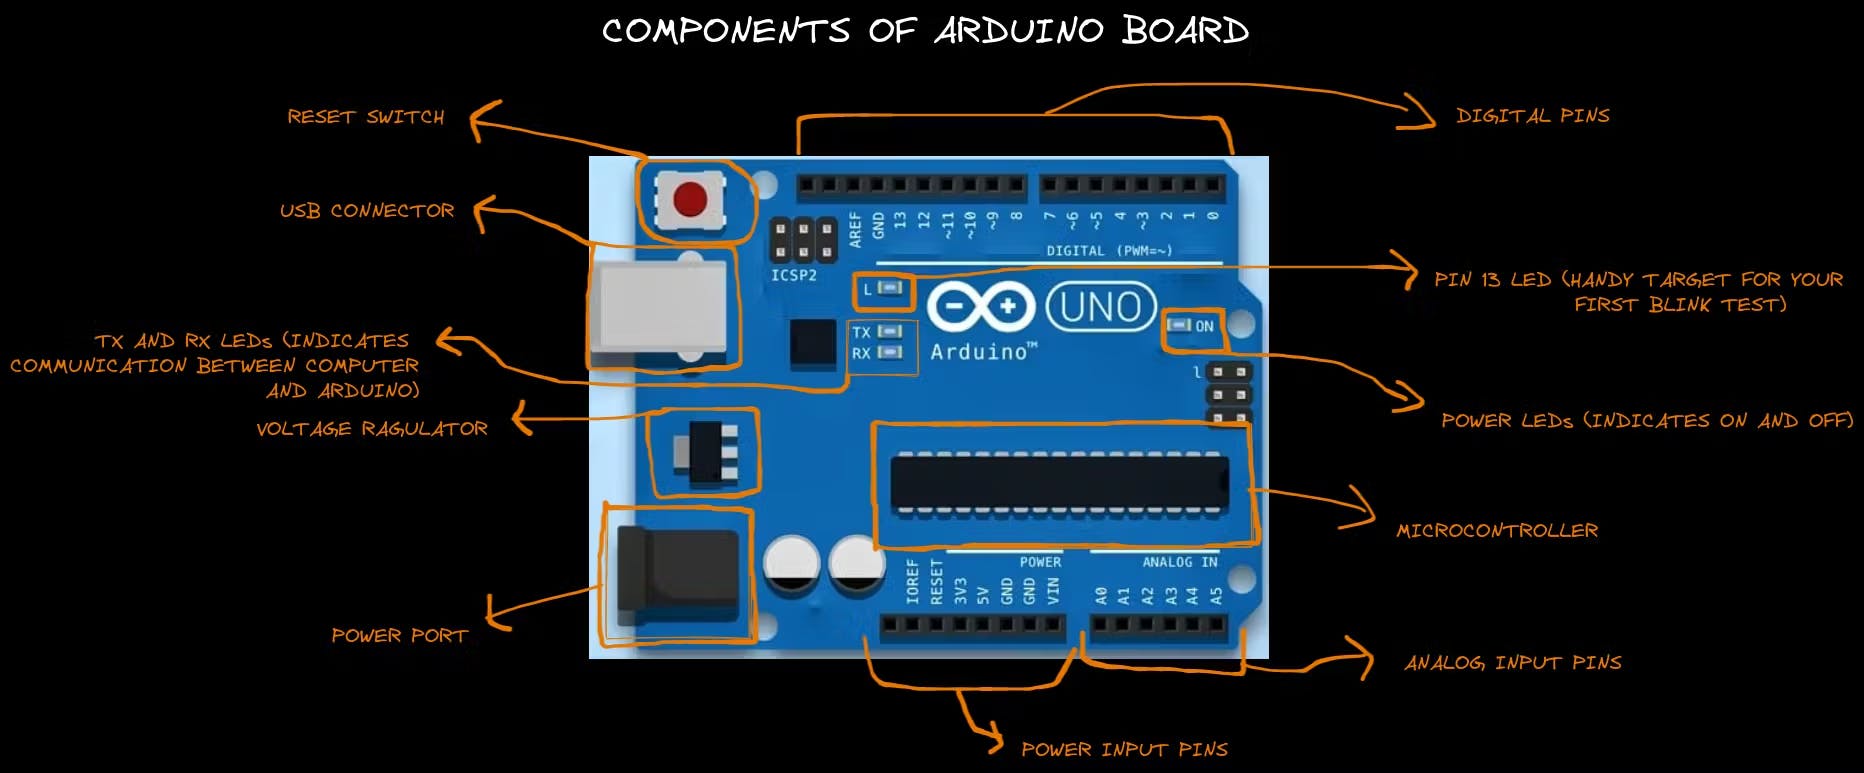
Detailed information about the board
Why Arduino
Unveiling the Power and Versatility of a Remarkable DIY Platform
User-Friendly Platform: Arduino is known for its user-friendly nature, making it ideal for beginners and enthusiasts with basic coding and electronics experience.
Rapid Prototyping: Arduino's ease of use and quick setup make it an excellent platform for rapidly prototyping ideas and concepts.
Cross-Platform Compatibility: Arduino IDE (Integrated Development Environment) is available for Windows, macOS, and Linux, providing flexibility in terms of the operating system you prefer.
Open Source: The Arduino platform under a Creative Commons license is published as an open-source tool, available for extension by experienced programmers. ( https://forum.arduino.cc/ )
Various types of Arduino
Various types of Arduino boards available in the market contain different compatibilities and functions.
- Here under is the compilation of some of the most suited Arduino Boards for beginners! They are:
1. ARDUINO UNO REV3
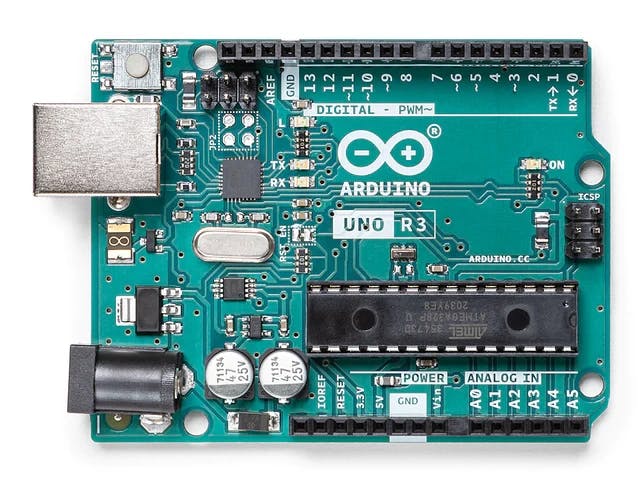
The Arduino Uno is the ideal board for beginners as it is your entry to the unique Arduino experience: great for learning the basics of how sensors and actuators work.
Arduino Uno Rev3 is the most used and documented board in the Arduino family. Many tutorials and projects are available online with instructions for you to get started.
It has 14 digital input/output pins (of which six can be used as PWM outputs), six analog inputs, a 16 MHz crystal oscillator, a USB connection, a power jack, and an ICSP header, and a reset button.
It contains everything needed to support the microcontroller; connect it to a computer with a USB cable or power it with an AC-to-DC adapter or battery to get started.
2. ARDUINO LEONARDO
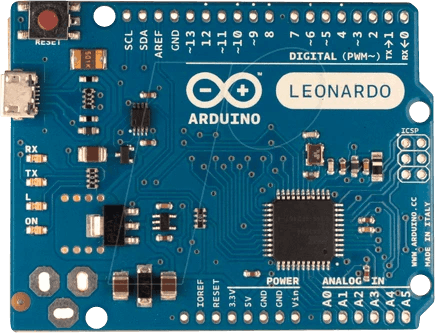
The Leonardo Arduino board is a Microcontroller board, and it is based on the ATmega32u4 data sheet. This Arduino board has 20 digital input pins, a 16MHz crystal oscillator, a micro USB connection, a RESET pin, and a power jack.
It has built-in USB communication, eliminating the need for a secondary processor. This allows the Leonardo to appear on a connected computer as a mouse and keyboard, in addition to a virtual (CDC) serial COM port.
3. ARDUINO RED BOARD
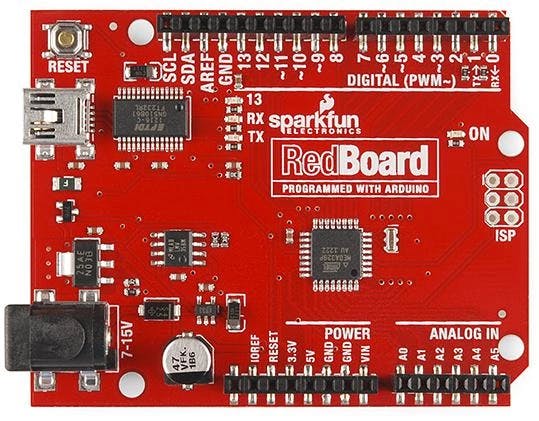
The Arduino red board is programmed by using the USB cable of mini-B with the help of Arduino IDE software.
Without any modifications in the security system, it works in all operating systems (OS). The Arduino red board is more consistent because USB and FTDI chips are used, and they are flat on the back.
It is effortless to create during project design. Just plug the board, select the menu option to choose an Arduino UNO, and you are ready to upload the program. You can control the RedBoard over a USB cable using the barrel jack.
4. LILYPAD ARDUINO
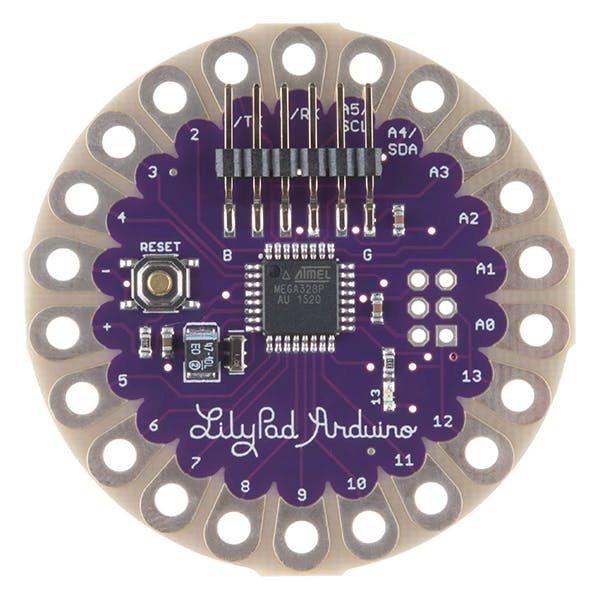
LilyPad is a wearable e-textile technology developed by Leah Buechley and cooperatively designed by Leah and SparkFun.
Each LilyPad was creatively designed with large connecting pads and a flat back to allow them to be sewn into clothing with conductive thread.
The LilyPad has its own family of input, output, power, and sensor boards explicitly built for e-textiles. They're even washable!
Want more history then please visit : https://docs.arduino.cc/retired/other/arduino-older-boards
ARDUINO CODING ENVIRONMENT AND BASIC TOOLS
After understanding the hardware of the Arduino Boards, let us now get started with Arduino programming.
Arduino code is written in C++ with an addition of special methods and functions. C++ is a human-readable programming language.
ARDUINO IDE
The Arduino Integrated Development Environment (IDE) is the main text editing program used for Arduino programming. It is where the main programmable code is written before uploading it to the board you want to program. Arduino code is referred to as SKETCHES.
Arduino IDE can be downloaded from here.
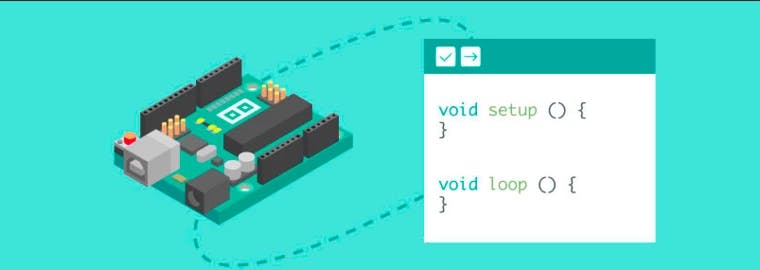
CODE STRUCTURE
  void setup(){
     //       put your setup code here to run once:
  }

  void loop(){

     //       put your loop code here to run repeatedly:
  }
LIBRARIES: Arduino has various built-in libraries which perform multiple functionalities. In addition, it is possible to import other libraries and expand the Arduino board's capabilities and features.
BUILT-IN FUNCTIONS :
Setup() Every Arduino sketch must have a setup function. This function defines the initial state of the Arduino upon boot and runs only once.
Here we'll define the following:
Pin functionality using the pinMode function
The initial state of the pins
Initialize classes
Initialize variables
Code logic
Setup() is also called Preparation Block.
loop()
The loop function is also necessary for every Arduino sketch and executes once setup() is complete. It is the primary function; as its name hints, it runs in a loop repeatedly. The loop describes the main logic of your circuit.
Loop() is also called Execution block.
Arduino basic projects for better understanding
Blinking LED: The classic beginner project. Connect an LED to one of the digital pins and make it blink on and off at a set interval. (project link soon)
Traffic Light Controller: Simulate a traffic light using three LEDs. Program it to cycle through red, yellow, and green, just like a real traffic light. (project link soon)
Temperature and Humidity Monitor: Use a DHT11 or DHT22 sensor to measure temperature and humidity. Display the values on an LCD screen or serial monitor. (project link soon)
Ultrasonic Distance Meter: Build a distance meter using an ultrasonic sensor (like HC-SR04) to measure distances and display them on an LCD.(project link soon)
Simple Robot Car: Create a small robot car using DC motors and a motor driver module. Program it to move forward, backwards, left, and right. (project link soon)
Light Theremin: Build a simple musical instrument that changes pitch based on the amount of light hitting a photoresistor. (project link soon)
Digital Dice: Create a digital dice using LEDs. Press a button, and the LEDs will simulate the roll of a die by displaying a random number. (project link soon)
Arduino Alarm System: Make a basic security system using a PIR motion sensor. When motion is detected, have an LED light up and a buzzer sound. (project link soon)
Temperature-Controlled Fan: Use a temperature sensor to monitor the environment. Turn on a fan when the temperature rises above a certain threshold. (project link soon)
Arduino Piano: Set up multiple buttons or touch sensors to create a simple piano. Each button represents a musical note, and pressing them produces sound. (project link soon)
Light-Controlled RGB LED: Connect an RGB LED and a light-dependent resistor (LDR). Change the colour of the LED based on the amount of light in the room. ( project link soon)
Arduino Stopwatch: Build a digital stopwatch with start, stop, and reset functionality using buttons and an LCD.( project link soon)
Analog Data Logger: Use a potentiometer to generate analog data, and then log and display the data on a screen. ( project link soon)
Servo Motor Control: Learn to control servo motors using Arduino. Create a simple project like a robotic arm that moves to specific angles. ( project link soon)
Digital Thermometer: Use a temperature sensor (DS18B20) to measure temperature and display it on an OLED screen. ( project link soon)
Arduino Simon Game: Build a simplified version of the classic Simon game. LEDs light up in a specific pattern, and the player has to repeat the pattern. ( project link soon)
Home Automation Prototype: Create a basic home automation system to control lights or appliances remotely using a smartphone app.(project link soon)
Soil Moisture Monitor: Build a soil moisture sensor using two nails and a transistor to measure soil moisture levels in a plant pot. ( project link soon)
Arduino Weather Station: Collect data from sensors like temperature, humidity, and pressure, and display the information on an LCD.( project link soon)
Arduino Advanced projects for innovators
Home Automation System: Create a comprehensive home automation system that controls lights, fans, appliances, and even HVAC systems using Arduino. Implement a smartphone app or web interface to remotely manage your home.
Wireless Weather Station: Develop a weather station that collects data like temperature, humidity, pressure, and wind speed. Display the data on a screen or send it to a cloud service for analysis.
Smart Mirror: Build a smart mirror that displays real-time information such as weather forecasts, calendar events, news headlines, and more, all integrated into the mirror's reflective surface.
Gesture-Controlled Robot: Construct a robot that can be controlled using hand gestures. Use sensors like accelerometers or gyroscopes to detect the gestures and move the robot accordingly.
Voice Assistant: Create a voice-controlled system using Arduino and a speech recognition module. Implement features like turning on/off lights, answering questions, and playing music.
Biometric Security System: Develop a biometric security system using fingerprint or facial recognition. Only authorized users would be granted access to a door or system.
Automated Plant Watering System: Build a system that monitors soil moisture levels and waters plants automatically when the soil gets too dry. This involves sensors, pumps, and potentially a microcontroller like Arduino.
Drone or Quadcopter: Design and build your own drone or quadcopter using Arduino. You'll need to integrate sensors, motors, and a flight controller to achieve stable flight.
3D Printer Control: Construct a 3D printer or retrofit an existing one to be controlled and monitored by Arduino. This requires precise stepper motor control and coordination.
Smart Car Parking System: Create a system that uses sensors to detect available parking spaces and guides drivers to open spots in a parking lot.
Home Energy Monitoring: Develop a system that measures energy consumption for various appliances and provides insights on how to reduce energy usage.
GPS Tracker: Build a GPS tracking device that can report its location to a web interface or a mobile app. Useful for tracking vehicles or personal items.
Self-Balancing Robot: Construct a two-wheeled self-balancing robot that can adjust its position to stay upright.
Arduino Oscilloscope: Turn your Arduino into a basic oscilloscope that can display and analyze electronic signals.
Arduino MIDI Controller: Create a MIDI controller that can be used to control music software or synthesizers. It could have buttons, knobs, and sliders.
Automated Pet Feeder: Design a system that dispenses food for your pets at scheduled times, ensuring they are fed even when you're not around.
Arduino Game Console: Build a handheld game console using Arduino and a compatible screen. Program and play simple games on it.
Smart Aquarium Controller: Develop a system that monitors and maintains an aquarium's temperature, lighting, and water conditions.
Robotic Arm: Create a robotic arm that can be controlled manually or programmed to perform specific tasks using servos or stepper motors.
Gesture-Controlled Wearable: Design a wearable device that can interpret hand gestures and trigger actions like sending messages, controlling music, or activating other devices.